

验证码识别
1、前言
工作关系,在做自动化测试的时候,不可避免要碰到验证码,如果中途暂停手动输入的话,未免太繁琐,所以我在这里总结了自己搜索到的资料,结合实践经验,与各位分享。
2、解决的问题
本次我解决的问题主要是比较传统的图片验证码识别,类似下图这样的:


滑块验证和顺序点击图片那种逆天的验证码本次不涉及。
3、方法
我这里有java和python的不同实现,背后的思路大体一致:
① 图片二值化
② 去噪点
③ 识别
下面通过代码给大家讲解,相关代码已上传至github,可在文末查看。
4、java实现
首先列出工程目录:
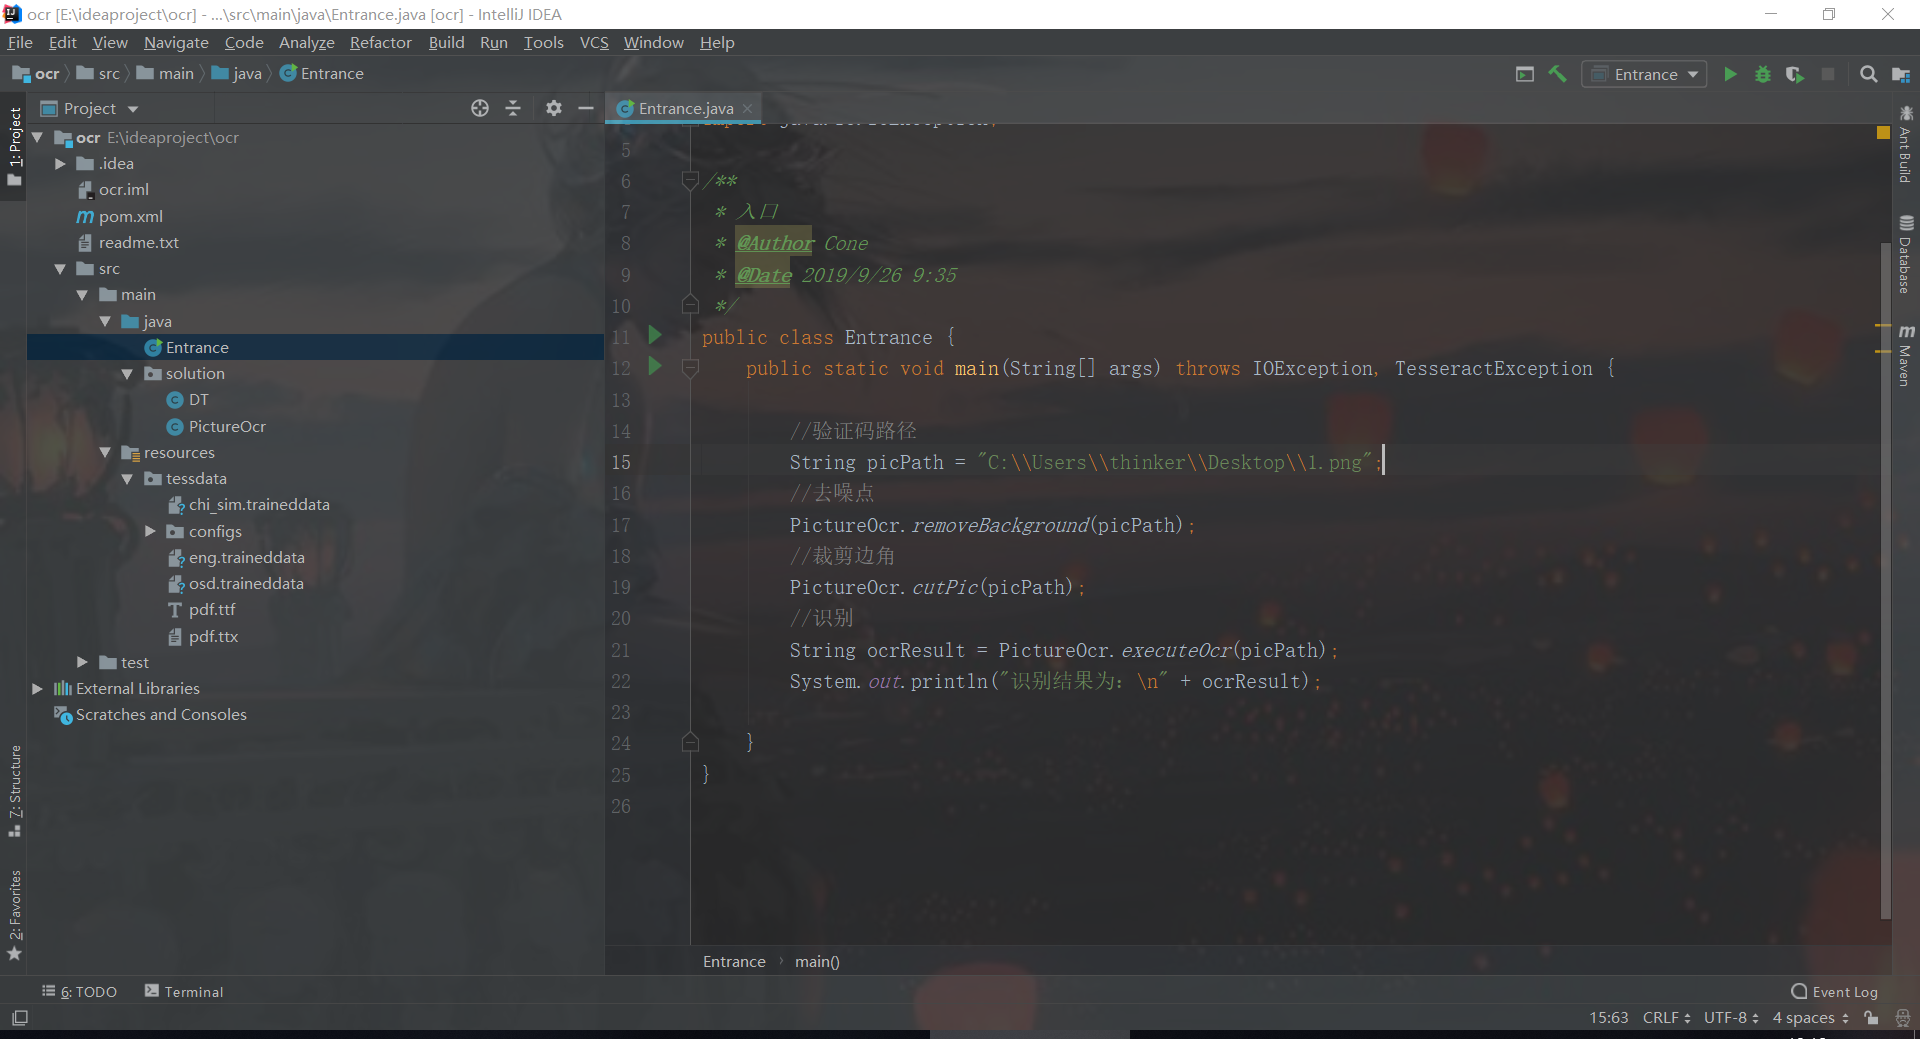
Entrance是程序入口,DT是一些配置信息,PictureOcr是识别用到的一些方法。
① 去噪点
1 /** 2 * 图片去噪点 3 * @param picPath 4 * @return 5 * @throws IOException 6 */ 7 public static void removeBackground(String picPath) throws IOException { 8 BufferedImage bufferedImage = ImageIO.read(new File(picPath)); 9 int width = bufferedImage.getWidth();10 int height = bufferedImage.getHeight();11 for (int x = 0; x < width; ++x) {12 for (int y = 0; y < height; ++y) {13 if (isWrite(bufferedImage.getRGB(x, y)) == 1) {14 bufferedImage.setRGB(x, y, Color.white.getRGB());15 } else {16 bufferedImage.setRGB(x, y, Color.black.getRGB());17 }18 }19 }20 ImageIO.write(bufferedImage, picType, new File(picPath));21 }
1 /** 2 * 如果某个像素的三原色值大于所设定的阈值,就将此像素设为白色,即为背景 3 * @param colorInt 4 * @return 5 */ 6 public static int isWrite(int colorInt) { 7 8 Color color = new Color(colorInt); 9 if (color.getRed() + color.getGreen() + color.getBlue() > DT.DictOfOcr.threshold) {10 return 1;11 }12 return 0;13 }
先取得图片的分辨率(长 * 宽),然后设定一个阈值,阈值就是某个像素的R,G,B三原色值的和,大家可以使用截图工具来分析要识别图像的验证码阈值是多少,以微信为例,验证码待识别区域的RGB值即可设定为阈值,大于此阈值的像素均设为白色,否则即设为黑色,这样便可以有效去除噪点。
② 裁剪边框
裁剪边框是为了尽可能大的保留图片特征,提高识别率
1 /** 2 * 裁剪边角 3 * @param picPath 4 * @throws IOException 5 */ 6 public static void cutPic(String picPath) throws IOException { 7 8 BufferedImage bufferedimage=ImageIO.read(new File(picPath)); 9 int width = bufferedimage.getWidth();10 int height = bufferedimage.getHeight();11 12 13 bufferedimage = cropPic(bufferedimage, (cutWidth / 2),0, (width - cutWidth / 2), height);14 bufferedimage = cropPic(bufferedimage,0, (cutHeight / 2),(width - cutWidth), (height - cutHeight / 2));15 ImageIO.write(bufferedimage, picType, new File(picPath));16 }17 18 /**19 * 根据参数裁剪图片20 * @param bufferedImage21 * @param startX22 * @param startY23 * @param endX24 * @param endY25 * @return26 */27 public static BufferedImage cropPic(BufferedImage bufferedImage, int startX, int startY, int endX, int endY) {28 int width = bufferedImage.getWidth();29 int height = bufferedImage.getHeight();30 if (startX == -1) {31 startX = 0;32 }33 if (startY == -1) {34 startY = 0;35 }36 if (endX == -1) {37 endX = width - 1;38 }39 if (endY == -1) {40 endY = height - 1;41 }42 BufferedImage result = new BufferedImage(endX - startX, endY - startY, 4);43 for (int x = startX; x < endX; ++x) {44 for (int y = startY; y < endY; ++y) {45 int rgb = bufferedImage.getRGB(x, y);46 result.setRGB(x - startX, y - startY, rgb);47 }48 }49 return result;50 }
③ 执行OCR识别
1 /** 2 * 执行Ocr识别 3 * @param picPath 4 * @return 5 * @throws TesseractException 6 */ 7 public static String executeOcr(String picPath) throws TesseractException { 8 9 ITesseract iTesseract = new Tesseract();10 iTesseract.setDatapath(tessdataPath);11 //iTesseract.setLanguage("eng");12 //可根据需要引入相关的训练集13 String ocrResult = iTesseract.doOCR(new File(picPath));14 return ocrResult;15 }
用到了tessdata数据包
④ 效果
对于规范的验证码来说,识别率还是很不错的,80%左右。我在工程resources路径下建立了一个image文件夹,里面有些图片,大家可以自行尝试。
5、python实现
思路如下:
构建一定数量的数据集(被打上标签的验证码图片),然后进行模型的训练:
1、二值化图片
2、分割并保存每一张图片中的字符
3、“提取分割出的中的特征值”
4、生成训练集
5、定义分类模型
6、测试分类效果


1 def capt_process(capt): 2 """ 3 图像预处理,将验证码图片转为二值型图片,按字符切割 4 :param capt: image 5 :return: 一个数组包含四个元素,每个元素是一张包含单个字符的二值型图片 6 """ 7 # 转为灰度图 8 capt_gray = capt.convert("L") 9 # 取得图片阈值10 threshold = get_threshold(capt_gray)11 # 二值化图片12 table = get_bin_table(threshold)13 capt_bw = capt_gray.point(table, "1")14 capt_per_char_list = []15 for i in range(4):16 x = 5 + i * 1517 y = 218 capt_per_char = capt_bw.crop((x, y, x + 13, y + 24))19 capt_per_char_list.append(capt_per_char)20 21 return capt_per_char_list
View Code
1 def get_threshold(capt): 2 """ 3 获取一张图片中,像素出现次数最多的像素,作为阈值 4 :param capt: 5 :return: 6 """ 7 pixel_dict = defaultdict(int) 8 # 取得图片长、宽 9 rows, cols = capt.size10 for i in range(rows):11 for j in range(cols):12 # 取得这一点的(r,g,b)13 pixel = capt.getpixel((i, j))14 # 以像素做key,出现的次数做value15 pixel_dict[pixel] += 116 # 取得字典中像素出现最多的次数17 count_max = max(pixel_dict.values())18 # 反转字典,改为以出现次数做key,方便后面取得像素19 pixel_dict_reverse = {v: k for k, v in pixel_dict.items()}20 # 取得出现次数最多的像素21 threshold = pixel_dict_reverse[count_max]22 return threshold
View Code
1 def get_bin_table(threshold): 2 """ 3 按照阈值进行二值化处理 4 :param threshold: 5 :return: 6 """ 7 table = [] 8 rate = 0.1 9 for i in range(256):10 if threshold * (1 - rate) <= i <= threshold * (1 + rate):11 table.append(1)12 else:13 table.append(0)14 return table
View Code
代码里都有注释,就不详细解释了。
本人python实现大量参考了这篇博文:
https://blog.csdn.net/weixin_38641983/article/details/80899354
具体每一步怎么做的,为什么这么做,都有清楚地解释,我在这里不再赘述,感谢这位博主。
我要说明的是,训练集可能每个人都不一样,图片切割尺寸也可能都不一样,这些需要在使用时随机应变。
6、结语
以上提供的方法只能识别简单的验证码,但是它为我们提供了一种问题解决范式,今后遇到类似的问题,不至于手忙脚乱。
相关代码还参考了以下博文:
https://segmentfault.com/a/1190000015240294?utm_source=tag-newest
再次感谢以上博主。
本文相关代码已上传至github,有问题欢迎与我交流。
https://github.com/Thinker-Mars/Demo/tree/master/picture-ocr